


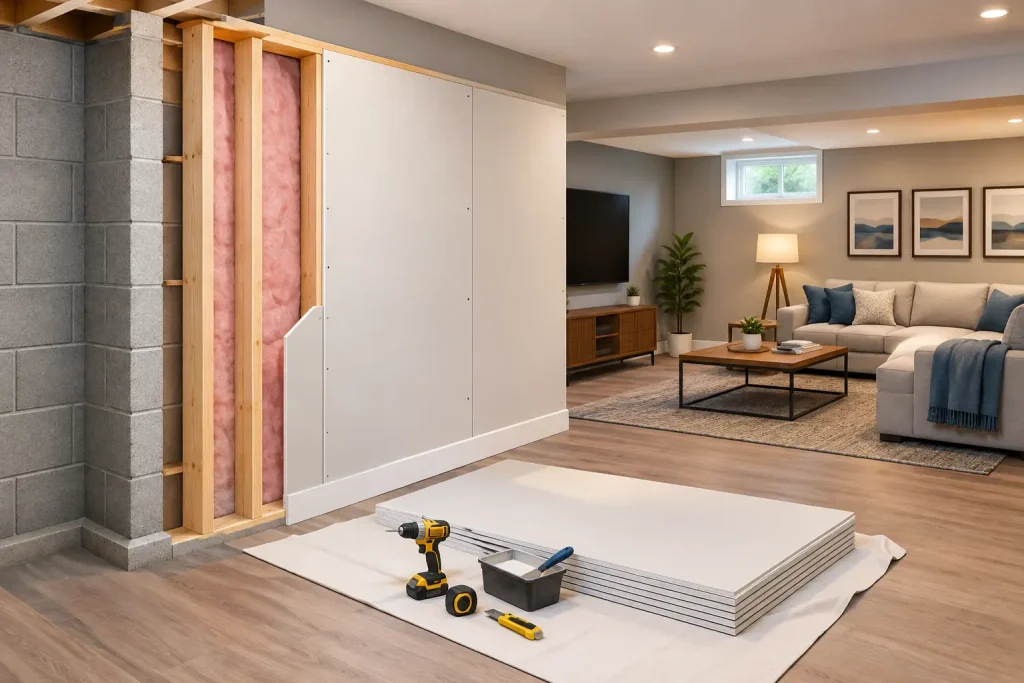
A finished basement can become the playroom, home office, guest space, or family room your house has been missing. But a basement wall is not just another interior wall. It sits beside concrete, soil, pipes, and potential moisture. This guide to finishing basement walls focuses on the work that has to happen behind the drywall, where good planning protects the finished space for years.
The biggest mistake homeowners make is choosing paint colors or wall paneling before they know whether the basement is dry. A clean, polished finish starts with moisture control, sound wall assembly, and careful framing. If those pieces are rushed, even beautiful finish work can end up stained, warped, or moldy.
A Guide to Finishing Basement Walls Starts With Water
Concrete foundation walls are porous. They can pass moisture vapor even when there is no obvious leak, and a heavy rain can expose problems that have stayed hidden for months. Before framing anything, inspect the walls and floor for white mineral deposits, damp spots, peeling paint, musty odors, cracks, or signs of prior water damage.
A minor crack does not always mean a major structural issue, but it should not be covered and forgotten. The same goes for an old water stain. Find out whether it came from a one-time plumbing issue, poor exterior drainage, a window well, or water entering through the foundation. If the cause is active, address it first.
Exterior conditions matter as much as the wall itself. Gutters should carry water away from the house, downspouts should discharge well beyond the foundation, and grading should slope away from the home where possible. In Staten Island and throughout the New York area, homes can also face storm-related water issues, high groundwater, and aging drainage systems. A basement renovation is the right time to look at the full picture, not just the surface you plan to finish.
If the basement has experienced significant water intrusion, bring in the right professional before moving forward. Water mitigation, drainage repairs, sump pump work, or foundation repairs may need to come before finish carpentry. Drywall is not a solution for a wet basement.
Choose the Right Wall Assembly
Once the space is dry and stable, the next decision is how to build the wall. The best assembly depends on the foundation condition, ceiling height, insulation goals, and local code requirements. There is no single material that belongs in every basement.
A common approach is to install rigid foam insulation against the concrete, seal the seams, then build a framed wall in front of it. The foam limits contact between warm indoor air and cold foundation concrete, helping reduce condensation risk. A properly designed assembly may also include fire-blocking and approved thermal barriers, depending on the materials used.
Another option uses a framed wall with mineral wool insulation. Mineral wool handles moisture better than standard fiberglass and offers good sound control, which can be valuable for a basement media room or guest area. Still, insulation alone does not solve moisture problems. The details at the concrete wall, rim joist, bottom plate, and vapor control layer all matter.
Avoid pressing wood framing or fiberglass insulation directly against a foundation wall that has not been properly prepared. That shortcut can trap moisture where you cannot see it. It may look fine on day one and create an expensive demolition job later.
Leave Room for the Foundation and Utilities
Basement walls are rarely perfectly flat. A contractor may need to adjust the wall location to create a straight finished surface, work around pipes, or preserve access to shutoff valves, cleanouts, electrical panels, and mechanical equipment. Do not frame a beautiful room that makes a necessary valve impossible to reach.
In many cases, the finished wall should sit slightly away from the foundation. That space makes it easier to create a straight frame and avoids unnecessary direct contact with concrete. The exact distance depends on the wall system, existing conditions, and available square footage.
Ceiling height is another real trade-off. Every inch used for insulation, framing, and drywall reduces the room dimensions. In a compact basement, careful planning can make the space feel comfortable instead of boxed in. Sometimes a thinner, code-appropriate assembly is worth considering. Other times, better insulation and moisture protection are the smarter investment.
Frame Basement Walls for a Lasting Finish
The framing stage sets the quality level for every finish that follows. Walls should be straight, plumb, and securely anchored, with openings properly built for doors, closets, and future built-ins. A wavy framed wall will show through in trim, cabinetry, tile transitions, and baseboards.
The bottom plate deserves special attention. Where framing contacts a concrete slab, use materials and methods appropriate for that application, commonly including a pressure-treated bottom plate and a moisture break where required. This is a small detail that helps protect the wall from slab moisture.
Before the walls are closed, plan every electrical and low-voltage need. Think beyond a few outlets. Where will the television go? Is there a desk, treadmill, bar area, or reading corner? Will the finished basement need recessed lighting, sconces, internet wiring, speakers, or a charging station? Adding these items after drywall is possible, but it is slower, messier, and more expensive.
A professional should also account for fire-blocking, egress requirements, smoke and carbon monoxide detectors, and permit requirements. If the basement will include a bedroom, the rules become even more specific. A sleeping room typically needs a compliant emergency escape and rescue opening, not simply a small basement window. Local requirements can vary, so this is not the place to guess.
Insulation, Air Sealing, and Comfort
A finished basement should not feel like an unfinished basement with furniture in it. Comfort comes from controlling drafts, cold surfaces, and humidity before the final coat of paint goes on.
Pay close attention to the rim joist, the area where the house framing meets the top of the foundation. It is often a major source of air leakage and heat loss. Proper air sealing and insulation in this area can make a noticeable difference in winter comfort and summer humidity.
Heating and cooling also need a plan. Extending an existing system is not always enough, especially if the new space will be used heavily. A contractor can help coordinate the framing and finish work with qualified HVAC professionals so supply vents, returns, equipment access, and soffits are handled cleanly. Covering a duct is easy. Designing a soffit that looks intentional and still allows service access takes experience.
Humidity is worth managing year-round. A dehumidifier may be a practical part of the finished space, particularly during humid Northeast summers. Keep it accessible for maintenance and make sure condensate drainage is handled properly.
Drywall and Finish Details Make the Room Feel Built In
After inspections are complete and rough work is approved, drywall can go up. Standard drywall may work in a properly dry basement, but moisture-resistant drywall is often a sensible choice for exterior basement walls, bathrooms, laundry areas, or spaces with a history of humidity. The right board is only one part of the decision. Good taping, corner work, sanding, and priming are what create a smooth final surface.
Trim choices have an outsized effect in a basement. Taller baseboards, clean door casing, and well-planned window trim can make the room feel connected to the rest of the home. If the floor may ever get damp, consider durable materials and avoid details that sit directly in harm’s way. Luxury vinyl plank, tile, and other water-tolerant finishes are often more forgiving than traditional solid hardwood.
Do not forget access panels. They are not glamorous, but a neatly placed panel for a shutoff valve, cleanout, or mechanical connection can prevent major wall repairs later. The best access panel is one that is planned early and blends into the finished room.
Know When a Full-Service Contractor Helps
Finishing basement walls often touches several trades at once: water mitigation, framing, insulation, electrical, plumbing, HVAC, drywall, painting, flooring, trim, and sometimes tile or custom built-ins. Managing those steps separately can create gaps in responsibility. One crew may blame another when something is not right.
A full-service contractor can coordinate the scope from the first inspection through the final finish details, while keeping the work area orderly and the homeowner informed. Clean Sweep Contracting approaches basement projects with that end-to-end mindset, because the framing, moisture protection, and finish carpentry all need to work together.
Start with the wall you cannot see, not the color you can. When a basement is dry, properly insulated, carefully framed, and finished with purpose, it becomes a real part of the home rather than a space you hope holds up.