

A small water stain on the ceiling has a way of turning into a much bigger job the moment you start opening things up. What looks like a simple patch can mean soaked insulation, swollen subfloor, mold risk, or damaged framing behind the surface. If you are wondering how to repair water damage, the real answer starts before paint, drywall, or flooring. You have to stop the source, dry the structure properly, and only then rebuild what was affected.
That order matters. A fast cosmetic fix might make the room look better for a week, but if moisture is still trapped inside the wall or under the floor, the problem usually comes back. For homeowners, that means more mess, more money, and more time spent fixing the same area twice.
How to repair water damage without missing the real problem
The first step is figuring out where the water came from and whether it is still active. A burst pipe, roof leak, failed appliance line, overflowing tub, and window leak can all leave similar damage on the surface, but the repair plan is not the same. If the source is not fully corrected, any repair work is temporary.
Clean water from a supply line is one situation. Water from a drain backup, toilet overflow, or long-standing leak is another. Once contamination is involved, materials like insulation, drywall, and flooring often need more aggressive removal. That is not overkill. It is the difference between a proper repair and trapping unsanitary material inside the structure.
After the source is stopped, the damaged area has to be evaluated honestly. Drywall that feels soft, trim that is swollen, flooring that is cupping, or base cabinets that have absorbed water may not be salvageable. Some materials can dry and stay stable. Others lose their shape or strength once they get wet.
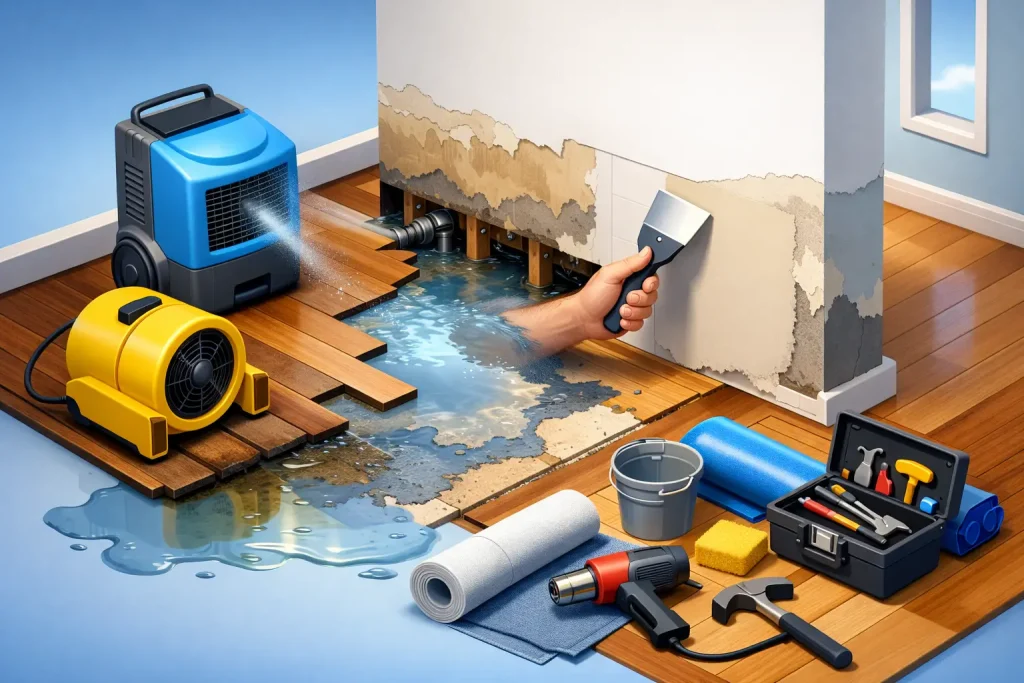
Start with water removal and structural drying
Before anything gets rebuilt, standing water and trapped moisture need to be addressed. This is where many homeowners rush. They see the visible puddle disappear and assume the area is dry. In reality, water moves into cavities, under flooring, behind trim, and into insulation.
Fans alone are not always enough. Drying a structure properly often calls for strategic airflow, dehumidification, and moisture testing. A basement, bathroom, or lower wall section may look dry on the outside while still holding moisture inside the assembly. That hidden moisture is what causes paint failure, musty odors, and mold growth later on.
There is also a timing issue. Some materials can be saved if drying starts quickly. Hardwood flooring, for example, may recover in limited cases if the water exposure is caught early and the boards have not buckled beyond repair. But if the water sits too long, the chances go down. The same goes for drywall. A clean-water incident caught immediately may allow for a smaller repair area. A long leak usually means wider replacement.
Remove what cannot be saved
A clean repair starts with a clean cutout. If drywall has absorbed water and lost integrity, it should be removed back to a solid, dry section. Wet insulation should usually come out as well, especially fiberglass batts that have been saturated. They do not perform well once soaked, and they can hold moisture in the wall cavity.
Baseboards, door casings, and trim often need to be pulled off to see what is happening behind them. In some cases they can be dried and reinstalled. In others, they swell, split, or delaminate and are better replaced. Laminate flooring and many engineered wood products are especially unforgiving after water exposure. Tile may survive, but the underlayment or adjacent materials may not.
This is also the stage where hidden damage gets discovered. Subfloors can soften. Framing can stain and stay damp. Ceiling leaks can travel along joists and show up far from the original entry point. That is why water damage repair is rarely just a patching job.
Treat the area before rebuilding
Once damaged materials are removed, the exposed structure should be dried to acceptable moisture levels and cleaned as needed. If there has been contamination or mold activity, the area may need more than standard cleanup. The right response depends on what kind of water was involved, how long materials stayed wet, and how far the damage spread.
For a straightforward clean-water event, the focus is usually on drying, cleaning, and confirming that framing and subfloor are sound. For older leaks or dirty water incidents, additional treatment may be necessary before the rebuild starts. This is one of those it-depends situations where a careful inspection matters more than guessing from the surface.
Rebuilding walls, ceilings, and trim
When the area is truly dry, rebuild work can begin. Drywall repair should be done to match the thickness and finish of the existing surface. Joints need proper taping, compound, sanding, and priming. If only one section is patched badly, it tends to stand out even more once painted.
Ceilings deserve extra attention because stains often bleed back through if the substrate is not sealed correctly. A fresh coat of paint without the right prep can leave a yellow or brown mark reappearing right through the finish.
Trim replacement should also be treated as finish carpentry, not an afterthought. Baseboards, casings, and mouldings need to fit cleanly, especially in a visible living space. The goal is not just to cover the repair. It is to make the room feel whole again.
Flooring repairs depend on the material
Flooring is where water damage gets tricky fast. Hardwood may stain, cup, crown, or buckle. Laminate often swells at the seams and usually cannot be restored. Vinyl is more water-resistant, but water can still get underneath and affect adhesive, underlayment, or subfloor. Tile can hide moisture problems below the finished surface.
If the subfloor has been compromised, replacing the top layer alone is not enough. A soft or uneven base will keep causing problems no matter how nice the new flooring looks. In many homes, especially after kitchen or bathroom leaks, the proper repair means working from the structure up.
Matching existing flooring is another challenge. Older wood floors may need blending and refinishing beyond the immediate damaged area. Tile lots may no longer match exactly. This is where experience matters. Good repair work is not only about replacing damaged material. It is about making the finished result look intentional.
When a water damage repair turns into a renovation
Sometimes water damage exposes a bigger opportunity. A damaged basement, bathroom, or kitchen wall may already need demolition, and homeowners decide to improve the space instead of restoring it exactly as it was. That can make sense, especially if cabinets, trim, flooring, or finishes were already dated.
The key is knowing where repair ends and renovation begins. If your goal is speed and insurance restoration, you may keep the scope tight. If the damage affects an older area that needed work anyway, it may be more practical to rebuild with better materials or a smarter layout.
This is where having one contractor handle both the repair side and the finish work makes life easier. Instead of patching the problem now and planning a second project later, the work can be coordinated properly from dry-out through final finishes.
Signs you should bring in a professional
Some water damage is minor and isolated. A small stain from a one-time issue might only need targeted drywall repair after the source is fixed. But widespread staining, sagging ceilings, soft flooring, repeated leaks, mold odor, or damage that reached multiple materials usually deserves a professional assessment.
The same goes for basements, bathrooms, kitchens, and any area where water may have moved into framing or under finished surfaces. What homeowners often see is the surface symptom. What drives cost and complexity is everything underneath.
For Staten Island homeowners, older housing stock can add another layer to the decision. Previous repairs, hidden pipe runs, layered flooring, and older framing details can all change how straightforward the work will be.
A better way to think about water damage repair
If you are trying to figure out how to repair water damage, think less about patching and more about restoring the assembly. The wall, floor, or ceiling has to be sound, dry, and properly rebuilt from the inside out. That is what protects the home long term and keeps the finish work from failing later.
Good repair work is not flashy. It is careful. It is clean. It is done in the right order, with attention to what cannot be seen after the job is finished. And when it is handled that way, your home does not just look repaired. It feels solid again.